1. Enable social login in your Dynamic Dashboard
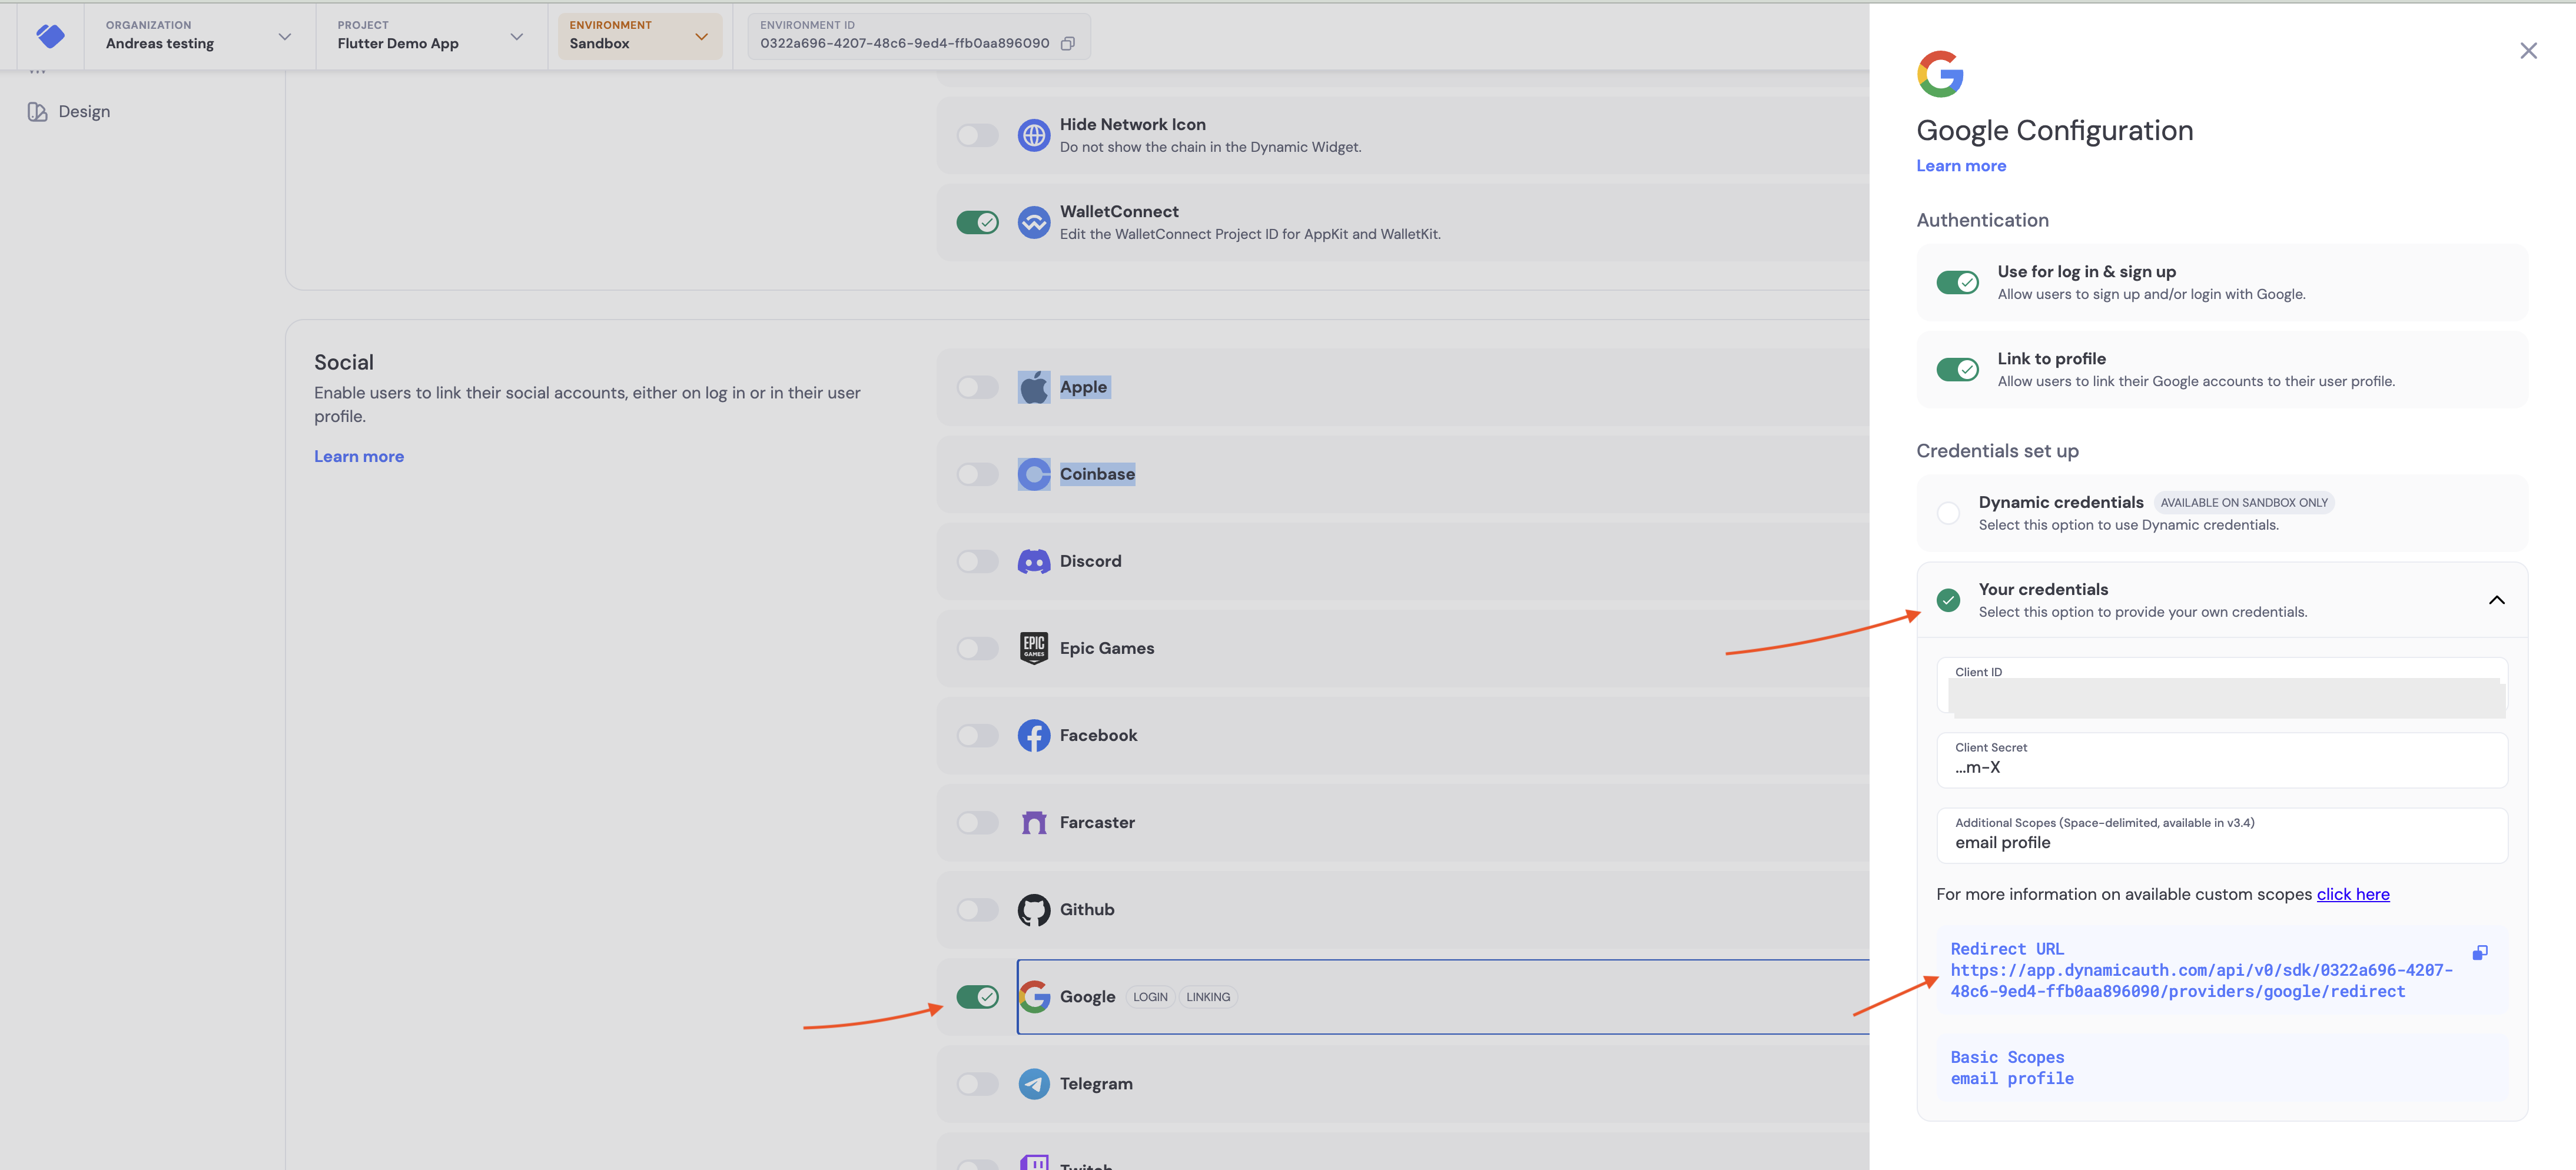
1.1. Enable Google login in the Dynamic Dashboard
- Go to the Login & User Profile settings
- Click on “Google”
- Toggle “Enable” on
- Copy the redirect URL shown in the Google section
1.2. Create Google OAuth credentials
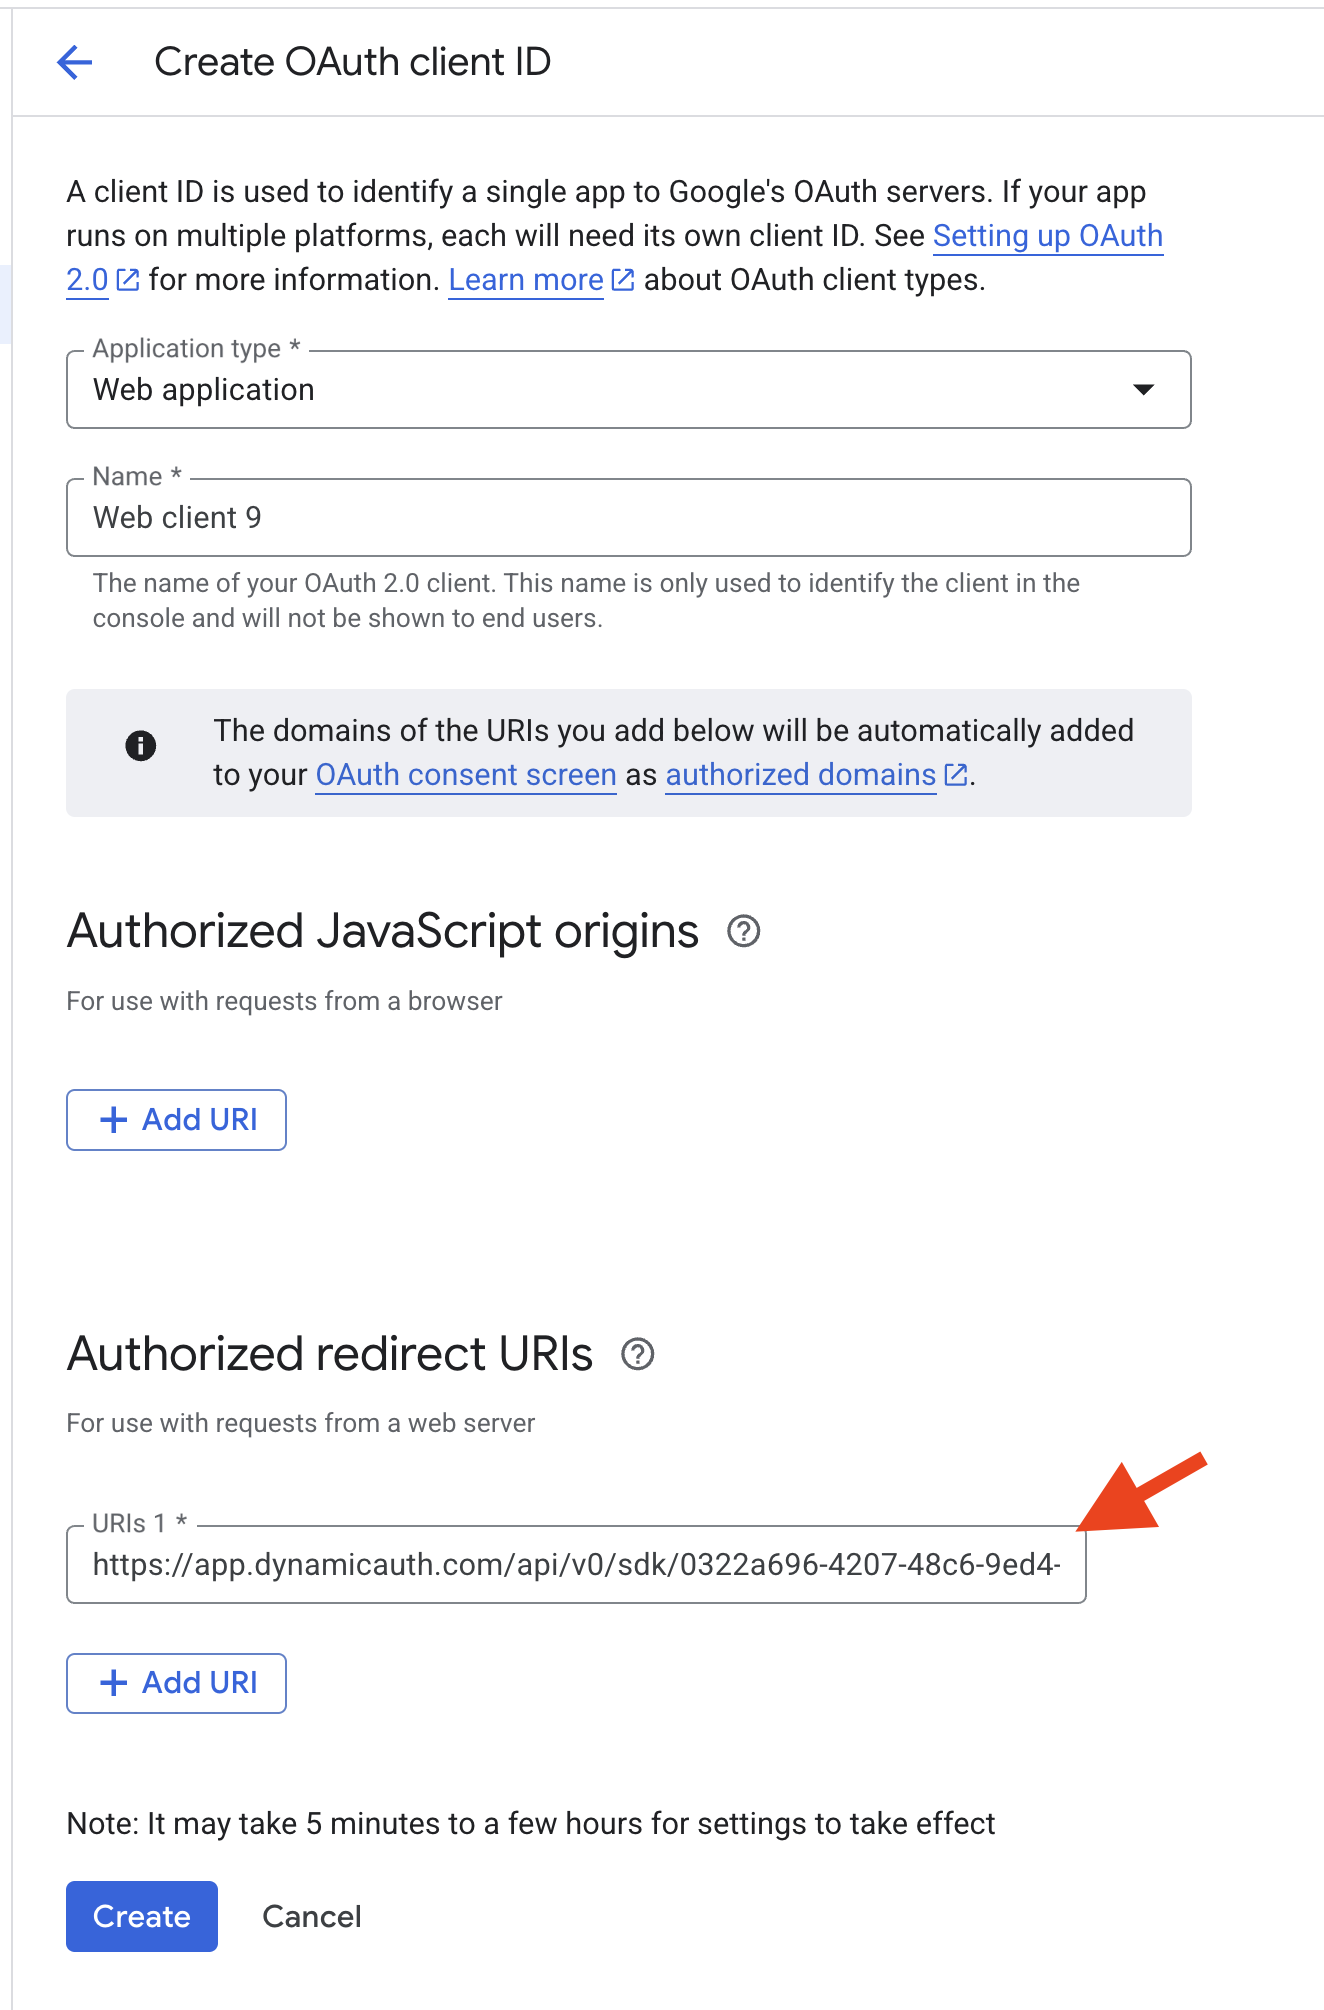
- Go to the Google Cloud Console credentials page
- Click on “Create credentials”
- Select “OAuth client ID”
- Choose “Web application” as the Application type
- Add the redirect URI from the Dynamic Dashboard Google section to “Authorized redirect URIs”
- Click “Create”
- Copy the “Client ID” and “Client Secret”
- Paste the “Client ID” and “Client Secret” into the Google section in your Dynamic Dashboard
- Click on “Save”

2. Enable deeplinking in your project
Android requires a special setup for social login deeplinks, which is covered
below. iOS does not require additional configuration for the basic social login
flow.If you want to use HTTPS links or implement more advanced deep linking
behavior, follow Flutter’s guide: Flutter Deep Linking.
2.1. Configure AndroidManifest.xml
You need to add a deeplink scheme to yourAndroidManifest.xml to enable deep linking in your app.
Add the following to your AndroidManifest.xml:
YOUR_CALLBACK_URL_SCHEME_HERE with your scheme, for example flutterdemo.
2.2. Remove any android:taskAffinity="" from your AndroidManifest.xml
In your AndroidManifest.xml, remove any android:taskAffinity="" from the activity tag. This prevents a bug on Android where the popup does not close properly.
2.3. Configure the Dynamic SDK to use your deeplink
AddredirectUrl to your DynamicSDK.init call so it matches your scheme.
flutterdemo scheme:
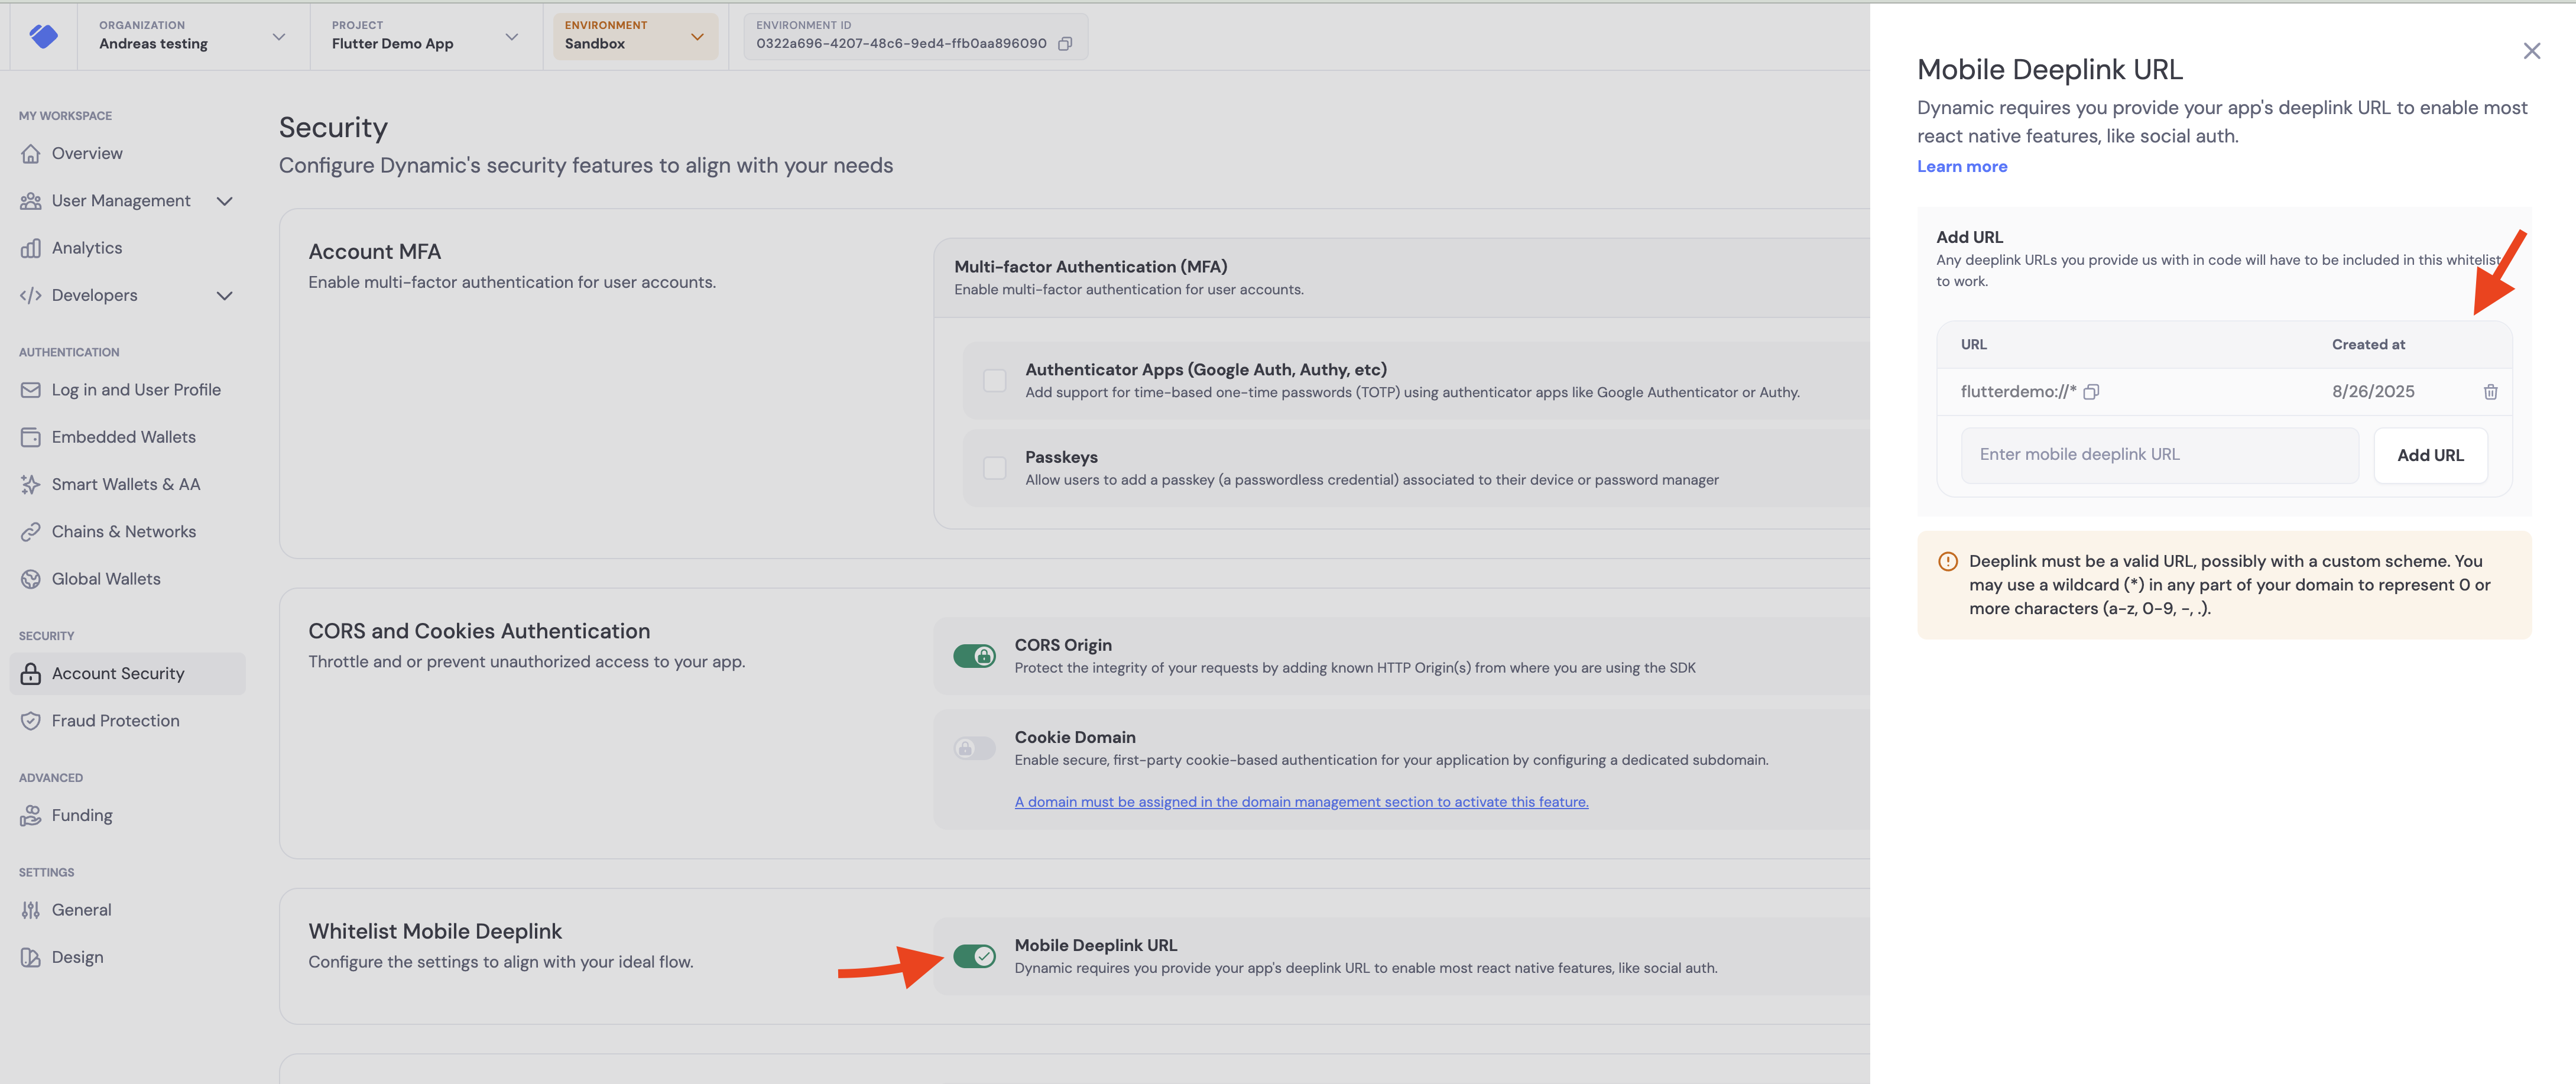
3. Whitelist your deeplink scheme in the Dynamic Dashboard
- Go to the Security page
- Enable “Mobile Deeplink URL”
- Add your deeplink pattern to the list, for example
flutterdemo://* - Click on “Save”
4. Run your app
- Run your app
- Click on the “Login” button
- Select “Google”
- A Google popup should appear
- Select your Google account
- You should be redirected to your app and logged in
Custom UI
If you prefer to build your own UI instead of using Dynamic’s pre-built authentication flow, you can use hooks for social login. Note that steps 1-3 above are still required - you still need to configure social providers in the Dynamic Dashboard, enable deeplinking, and whitelist your deeplink scheme. You can use theauth.social.connect method to trigger social authentication programmatically: