Show Smart Wallet only - Interact only with the smart-contract wallet in the SDK. Users will need to send assets to an external wallet if exporting their key.
Show Smart Wallet & Signer - Display the smart wallet and signer wallet as separate wallets in the SDK, allowing switching between them to more easily export assets.
Note that there is a delay between loading the page and the ZeroDev kernel client
being available. To ensure that the kernel client is available,
please await one of the following methods: getAddress(), getConnectedAccounts() or getNetwork()
before calling getAccountAbstractionProvider().
You can use viem or ethers with account abstraction to sign messages or send sponsored transaction with no extra configuration, it also works with our wagmi integration.
Once you’ve tested things out and want to deploy to a live network, you will need to do the following:
Add your credit card to ZeroDev under Account Settings > Billing
Create a new ZeroDev project and select a live network
Copy your new ZeroDev project id and paste it into your Dynamic Dashboard
a. We recommend using your Dynamic Sandbox environment for testing your testnet setup, and using your Dynamic Live environment for production.
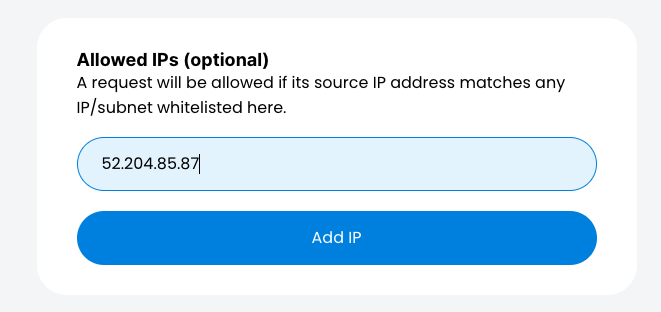
In order to restrict access to your ZeroDev project id to allow only dynamic to use it you can add dynamic’s static IP address’s to your projects IP allowlist.See Dynamic’s Static IP Addresses for more information.
[Legacy 4337] Get smart wallet address vs signer address
For Legacy (4337) implementations, the wallet connector will return your smart wallet address, that address will be used in the Dynamic UI and is the main address you will interact with. But you can fetch the signer address by using the wallet connector’s eoaConnector property and then fetching the address there.
This example only applies to Legacy (4337) implementations. With 7702, the smart wallet and signer addresses are the same.
When you need to sponsor transactions using ERC20 tokens instead of native gas tokens, you’ll need to use the ERC20 paymaster functionality. This requires creating the Kernel client directly and handling the ERC20 approval for the paymaster.
ERC20 paymaster requires additional setup beyond the standard sponsored transactions. You’ll need to create the Kernel client manually and handle token approvals.
Copy
Ask AI
import { FC, FormEventHandler, useState } from 'react';import { getERC20PaymasterApproveCall } from '@zerodev/sdk';import { createZeroDevPaymasterClient } from '@zerodev/sdk/clients';import { getEntryPoint, KERNEL_V3_3 } from '@zerodev/sdk/constants';import { Hex, http, parseEther } from 'viem';import { createEcdsaKernelAccountClientWith7702 } from '@dynamic-labs/ethereum-aa';import { chainsMap, isEthereumWallet } from '@dynamic-labs/ethereum-core';import { useDynamicContext, useSmartWallets } from '@dynamic-labs/sdk-react-core';import { isDynamicWaasConnector } from '@dynamic-labs/wallet-connector-core';export const ERC20PaymasterExample: FC = () => { const { primaryWallet } = useDynamicContext(); const { getEOAWallet } = useSmartWallets(); const [address, setAddress] = useState(''); const [amount, setAmount] = useState(''); const [erc20TokenAddress, setErc20TokenAddress] = useState( '0x036CbD53842c5426634e7929541eC2318f3dCF7e' // Example token address ); const [result, setResult] = useState(''); if (!primaryWallet || !isEthereumWallet(primaryWallet)) { return <div>ERC20 paymaster is only supported for Ethereum wallets</div>; } const onSubmit: FormEventHandler<HTMLFormElement> = async (event) => { event.preventDefault(); try { setResult('Creating ZeroDev kernel client...'); const eoaWallet = getEOAWallet(primaryWallet); if (!eoaWallet) throw new Error('No EOA wallet found'); if (!isDynamicWaasConnector(eoaWallet.connector)) { throw new Error('Connector is not a Dynamic Waas connector'); } // Get the signer from the primary wallet const signer = await eoaWallet.connector.getWalletClient(); const network = await primaryWallet.getNetwork(); if (!network) throw new Error('No network found'); const chain = chainsMap[network.toString()]; if (!chain) throw new Error(`Unsupported chain: ${network}`); // ZeroDev configuration - replace with your actual project ID const projectId = 'YOUR_ZERODEV_PROJECT_ID'; const entryPoint = getEntryPoint('0.7'); setResult('Creating kernel client with ERC20 paymaster...'); // Create the kernel client with EIP-7702 and ERC20 paymaster, use createEcdsaKernelAccountClient if you are not using EIP-7702 const kernelClient = await createEcdsaKernelAccountClientWith7702({ apiKernelVersion: KERNEL_V3_3, // Use KERNEL_V3_3 for EIP-7702 compatibility or get this info from our dashboard chain, enableKernelV3Migration: true, // If you want to migrate users to the new kernel version entryPoint, kernelVersion: KERNEL_V3_3, // Use KERNEL_V3_3 for EIP-7702 compatibility or get this info from our dashboard paymaster: erc20TokenAddress as Hex, // Use your ERC20 token address here projectId, signer, }); // Create paymaster client for approval const paymasterClient = createZeroDevPaymasterClient({ chain, transport: http(`https://rpc.zerodev.app/api/v2/paymaster/${projectId}`), }); setResult('Sending transaction with ERC20 approval...'); // Prepare the transaction with batched approval const value = parseEther(amount); const callData = await kernelClient.account.encodeCalls([ // The ERC20 approval for paymaster await getERC20PaymasterApproveCall(paymasterClient, { approveAmount: parseEther('0.1'), entryPoint, gasToken: erc20TokenAddress as Hex, }), // The actual transaction call { data: '0x' as Hex, to: address as Hex, value, }, ]); // Send the user operation const hash = await kernelClient.sendUserOperation({ callData }); setResult(`Transaction sent! User operation hash: ${hash}`); // Wait for the transaction receipt const receipt = await kernelClient.waitForUserOperationReceipt({ hash }); setResult(`Transaction confirmed! Receipt: ${JSON.stringify(receipt, null, 2)}`); } catch (error) { setResult(`Transaction failed: ${error instanceof Error ? error.message : 'Unknown error'}`); } }; return ( <form onSubmit={onSubmit}> <div> <label htmlFor="address">Target address</label> <input value={address} onChange={({ target }) => setAddress(target.value)} name="address" id="address" type="text" required placeholder="0x..." /> </div> <div> <label htmlFor="amount">Transaction amount (in ETH)</label> <input value={amount} onChange={({ target }) => setAmount(target.value)} name="amount" id="amount" type="text" required placeholder="0.05" /> </div> <div> <label htmlFor="erc20TokenAddress">ERC20 Paymaster Token Address</label> <input value={erc20TokenAddress} onChange={({ target }) => setErc20TokenAddress(target.value)} name="erc20TokenAddress" id="erc20TokenAddress" type="text" required placeholder="0xA0b86a33E6441b8b5d865Db8a6E05e70b4cfB4be" /> </div> <button type="submit"> Send with ZeroDev (EIP-7702 + ERC20 Paymaster) </button> {result && ( <pre style={{ whiteSpace: 'pre-wrap' }}> {result} </pre> )} </form> );};
Manual Kernel Client Creation: Unlike standard sponsored transactions, ERC20 paymaster requires creating the kernel client manually using createEcdsaKernelAccountClientWith7702 or createEcdsaKernelAccountClient.
ERC20 Approval: The paymaster needs approval to spend the ERC20 tokens for gas. Use getERC20PaymasterApproveCall to generate the approval call.
Batched Transactions: Combine the ERC20 approval and your actual transaction into a single user operation using encodeCalls.
Prerequisites:
Your wallet must have sufficient ERC20 tokens to pay for gas
The ERC20 token must be configured in your ZeroDev paymaster configuration
Make sure to replace YOUR_ZERODEV_PROJECT_ID with your actual ZeroDev project ID. You can find this in your ZeroDev dashboard.
Can I use an existing wallet as a smart contract wallet with account abstraction?
Yes, but not today with Dynamic. We are working on developing new flows to make managing existing EOA wallets with SCWs a smooth transition.
What networks are supported for deploying smart contract wallets?
It depends which provider you choose. For example, with ZeroDev you have the following options:
Arbitrum One
Avalanche
Base
Binance Smart Chain
Ethereum
Optimism
Polygon
Can I change the network for a smart contract wallet after it's deployed?
Each provider will handle things differently, so it’s always better to check
directly with them. For example, with ZeroDev you can’t change the network
after deployment. With Alchemy, it might be possible in a roundabout way.
What happens if I don't want to use a provider i.e. ZeroDev any more?
With Dynamic, you will need to use either ZeroDev or Alchemy. If you have
alternative AA providers, please reach out via our
slack.
What pricing package includes this feature?
This is an advanced feature, but there is
no additional cost from Dynamic beyond the advanced tier itself. The providers
do take a transaction fee, which you can see on their respective pricing
pages.
What does private beta mean in this context, what should I expect?
We are adding customers one at a time for a few weeks, after which we’ll open
it up to the general public as GA.
How are private keys securely managed and stored for smart contract wallets with account abstraction?
Private keys are managed by the EOA, not the SCW. Every SCW has a Signer, or
Owner, which is the EOA.
What is the process for recovering a smart contract wallet in case of key loss or compromise?
The only way the SCW can be recovered is if the EOA is recovered. The SCW is a
smart contract, and the EOA is the owner of the SCW. If the EOA is lost, the
SCW is lost.
Are your smart contract wallets non-custodial?
It’s a common misconception that AA wallets are inherently non-custodial. In fact, whether a wallet is AA or not has nothing to do with whether it’s custodial. It’s the signers that determine whether a wallet is custodial.That is, if you use a non-custodial signer such as local private keys to manage your AA wallet, then it’s non-custodial. At the same time, if you use a custodial key provider such as Fireblocks to manage your AA wallet, then it’s custodial.In any case, whoever has custody over the signers has custody over the wallet.
Why is it better to do this through Dynamic than integrating ZeroDev directly?
We have wrapped our providers so you get all the benefit, and more. For
example, we handle the transaction hashing so it’s user friendly and are able
to show the SCW in our widgets and connectors.