How to Bridge Stablecoins to a Different Blockchain Network: A Step-by-Step Guide
This guide explains how to safely and efficiently bridge stablecoins between blockchains, covering when to do it, how it works, and step-by-step instructions using popular bridging tools.
If you need to move stablecoins from one blockchain network to another, you need a bridge. Whether you're bridging from Ethereum to Solana to save on gas, or targeting an app limited to one chain, stablecoin bridging gets you there. This guide will walk you through the basics of how bridging works and how to do it safely and efficiently.
What Does 'Bridging' Mean in Crypto?
Bridging is the process of transferring tokens (like USDC or USDT) between two different blockchain networks. For example, you might want to bridge USDC from Ethereum to Arbitrum, or from Solana to Base.
Since each blockchain operates independently, you can’t just “send” assets across chains the way you would between wallets on the same network. Instead, a bridge acts as a trusted middle layer that locks your tokens on the source chain and issues equivalent tokens on the destination chain. While bridging used to be a slow and inefficient process, recent developments have made bridging to most networks near-instant and cheap.
Situations Where Bridging Stablecoins Makes Sense
Crypto native users bridge funds regularly to pursue new opportunities, try new apps, and maximize the yield they are receiving. When it comes to stablecoins, here are some key scenarios where bridging makes sense:
- To reduce transaction fees: Bridge to lower-cost chains like Solana or Base, where gas is significantly cheaper than Ethereum.
- To access chain-specific apps: Certain DeFi protocols and apps only run on chains such as Arbitrum or Solana.
- To speed up transaction settlement: Use Layer-2s or alternative L1s to avoid congestion and get faster finality.
- To pursue higher yield: Explore newer chains offering yield-bearing protocols or token incentives tied to real-world assets.
- To enable spending options: Move your stablecoins to chains that are compatible with your preferred wallet or crypto debit card.
Step 1: Choose a Bridge
There is a growing list of bridges that support stablecoins across major blockchains. First off, you’ll need to pick a bridge that supports both of the networks you’re moving between. Additionally, you’ll want to compare slippage and liquidity, to make sure that you preserve as much value as possible with the transfer.
Here are some popular bridges that you can explore:
- Jumper Exchange: Fast bridging for stablecoins between Ethereum and L2s like Optimism or Base.
- Wormhole: Cross-chain bridging between Solana, Ethereum, and many others.
- Stargate: Cheap and fast bridging across an extensive list of blockchains.
- Native bridges: Chains like Arbitrum and Base offer built-in bridges to move assets from Ethereum, but note these bridgings sometimes have lock-up periods.
Step 2: Connect Your Wallet and Choose Your Chains
When you arrive at your chosen bridge, the interface will look something like this:
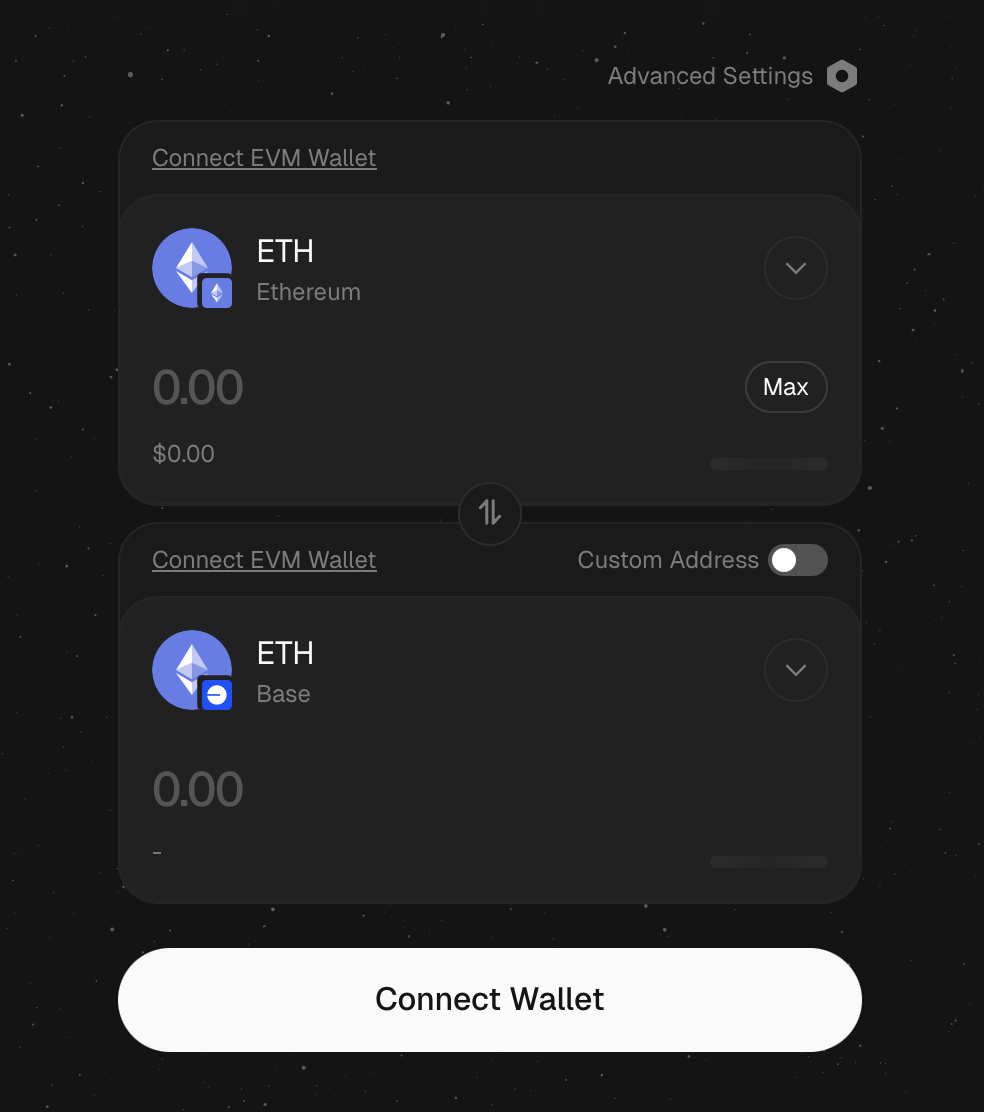
Similar to any other application, you’ll need to connect your wallet when you arrive. Most bridges support all of the popular EOAs like MetaMask and Phantom. After you follow the prompts and approve the connection, you need to select which blockchains you want to bridge between.
At the top, select the network that you want to bridge assets out of. Once you select a certain network, your token holdings on that network will appear on the dropdown. After, select your desired destination chain on the lower box and you’re ready to bridge.
Step 3: Select the Token and Amount
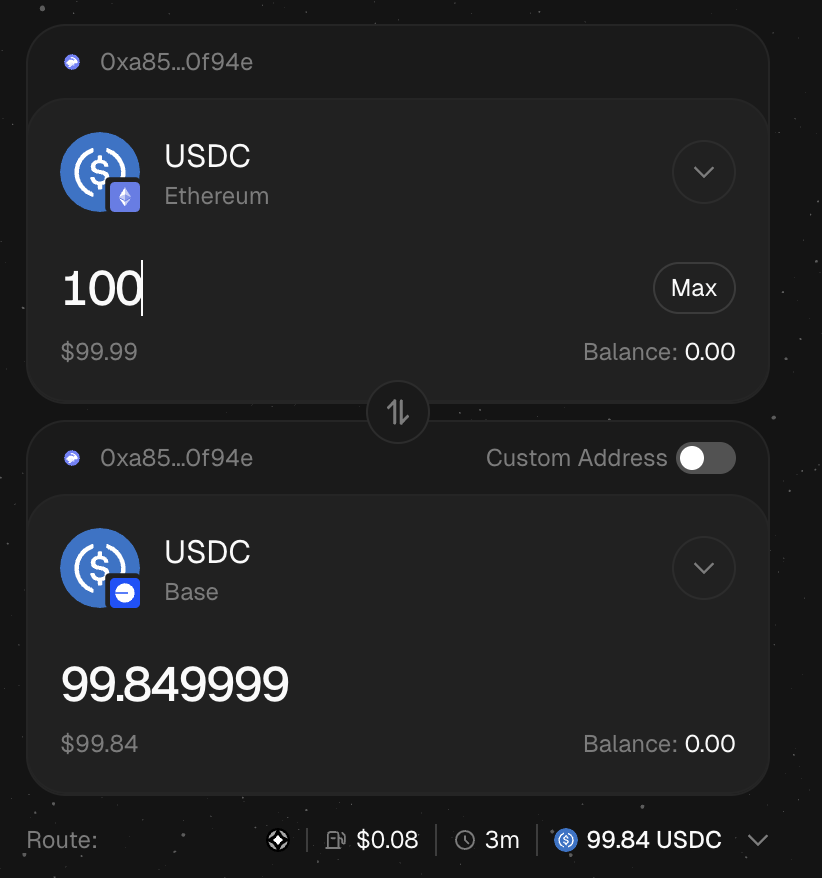
With your networks selected, you can now choose the stablecoin you want to bridge and enter the amount. Always double-check the token symbol, chain names and logos, as well as the estimated fees and any potential value slippage before confirming the transaction. If the estimate shows that you will lose significant value by bridging, you will want to explore other options for that route.
All of that information can be found at the bottom of the app’s interface. Here’s how the interface looks when you are connected and ready to bridge assets across networks:
Step 4: Approve and Confirm the Transaction
Once you click “transfer” to initiate the transaction, your wallet will ask for permission to proceed. Process the transaction and will be shown a confirmation screen, along with an estimated arrival time for your assets.
The transfer may take anywhere from a few seconds to several minutes, depending on the bridge and networks involved. If it doesn’t go through right away, there’s no need to worry. On the right sidebar, you can keep track bridge transactions in motion, as well as past activity:

Once your transaction is complete, switch your wallet to the destination chain to see your bridged stablecoins.
Bonus Tips for Safer Bridging
Bridging can be simple, but a few smart habits can go a long way. Here are some bonus tips to stay safe and avoid costly mistakes:
- Start small: It’s never a bad idea to send a test transaction with a small amount before sending large funds. This is also true with sending funds to other wallets.
- Use trusted bridges: Only use bridges with strong reputations and active security audits.
- Check fees and slippage: Some bridges charge higher fees than others or require minimum amounts. It’s important to always look at the estimate before confirming a transaction.
- Avoid phishing sites: Always double-check the URL and only use links from official docs or company pages.
Share