

The dashboard and API steps below set environment-wide policy rules. For account, wallet, and signer layers, see Managing layers for API examples, or the JavaScript SDK business accounts guide for SDK helpers.
Wallet and signer policy layers are in early access. Talk to us if you’d like to participate.
Creating a Rule
Step 1: Navigate to the Policies Tab
On the developer dashboard, navigate to the Policies tab under the Wallets section. Click on Create your first rule to get started.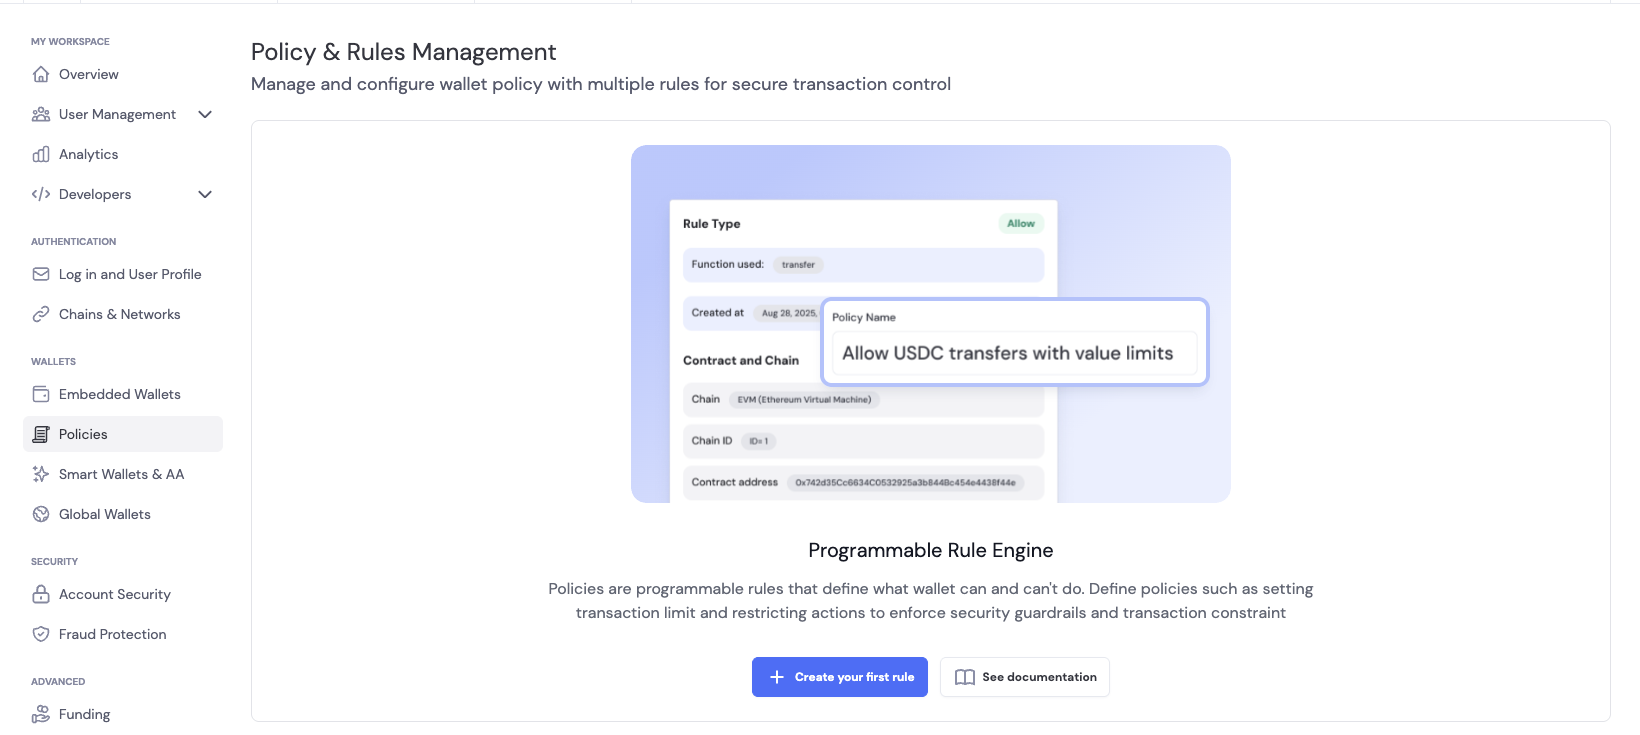
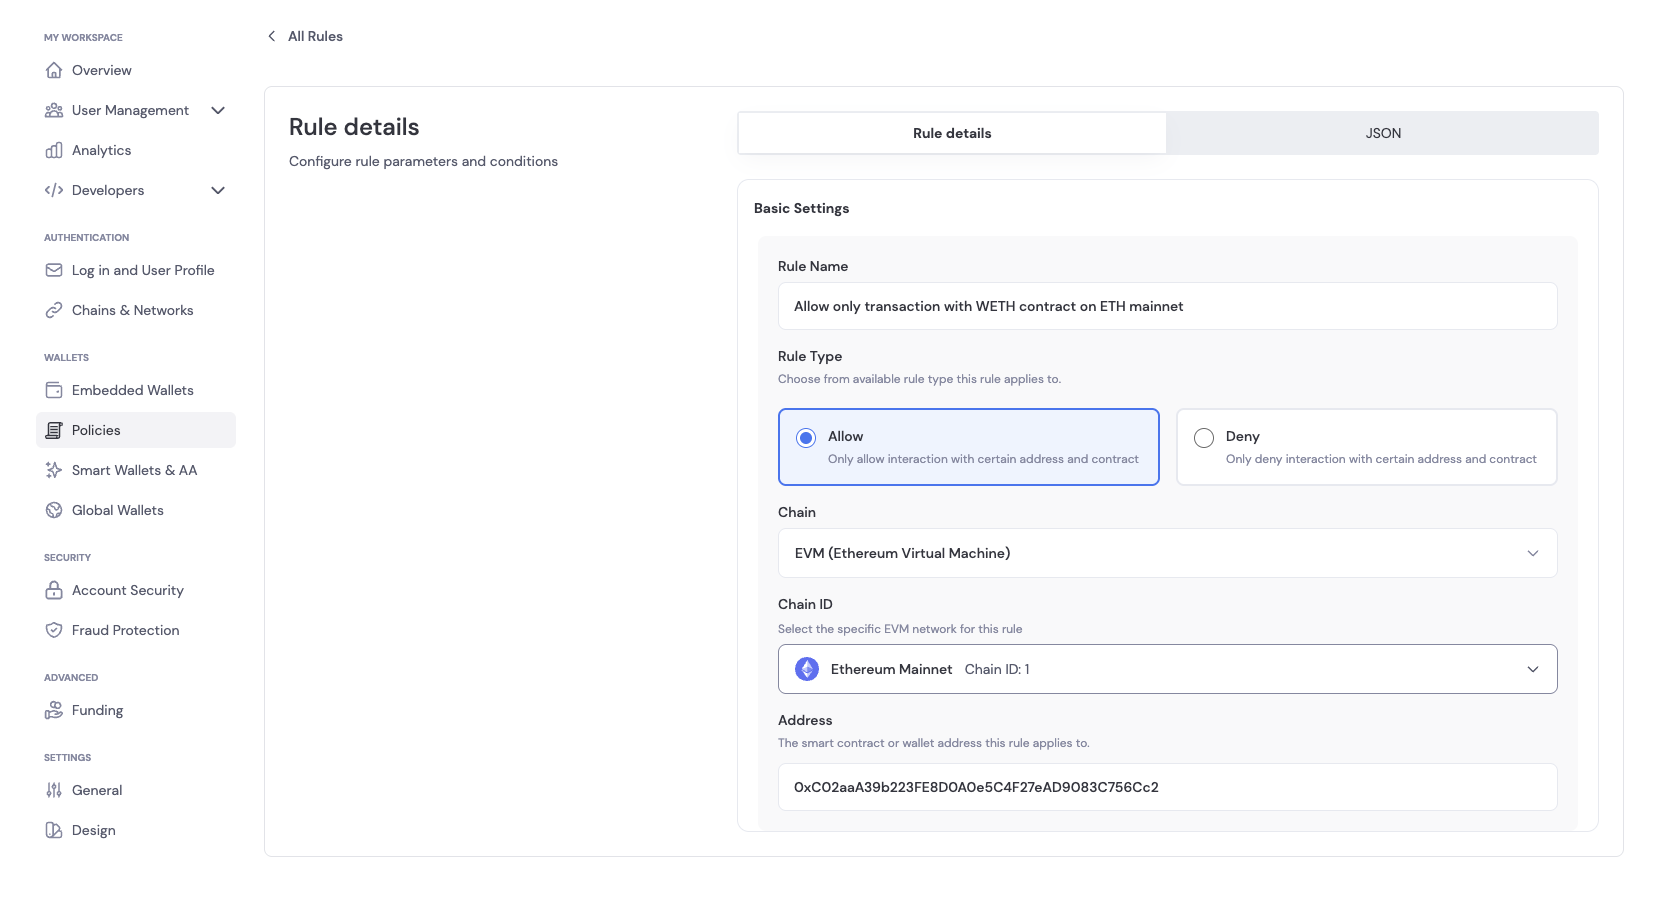
Step 2: Configure the Rule
In Basic Settings, you can configure the following for the rule:- Rule Name: A descriptive name for the rule
- Rule Description: A description of the rule
- Rule Type: The type of rule to create. You can choose between:
- Allow: This rule allows the operation to proceed
- Deny: This rule blocks the operation
- Network/Environment: The specific network or environment, such as Sepolia, Base Sepolia, etc.
- Addresses: The addresses the rule applies to
Step 3: Add/Update a Rule
There are two ways to add/update a rule: you can either update using the dashboard or send an API request with your authorized token.Creating a Rule
- Click on Save Rule to create a rule by clicking on Add Rule in Basic Settings once you have configured the rule.
- You can also send an API request with your authorized token to create/update a rule. The payload can be found in the JSON tab of the Rule creation page.
Update a Rule
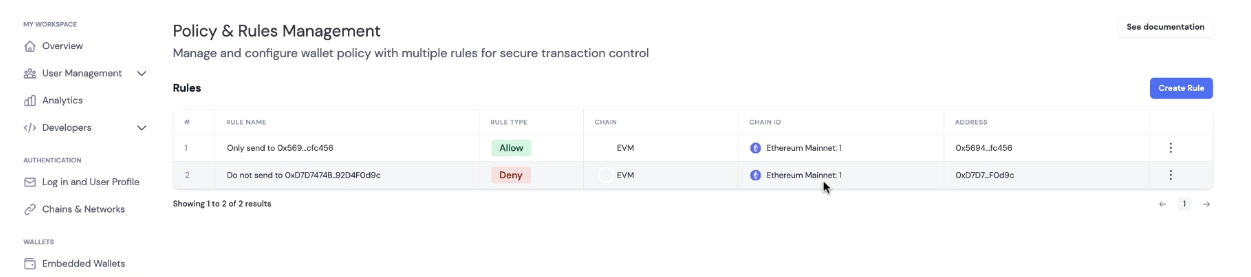
If you have active rules, you will see the Policy & Rules Management tab in the Policies tab.- Click on the rule you want to update, which will expand to the Edit Rule page
- Update the rule configuration and click on Save Rule to update the rule
Step 4: Verifying Policy
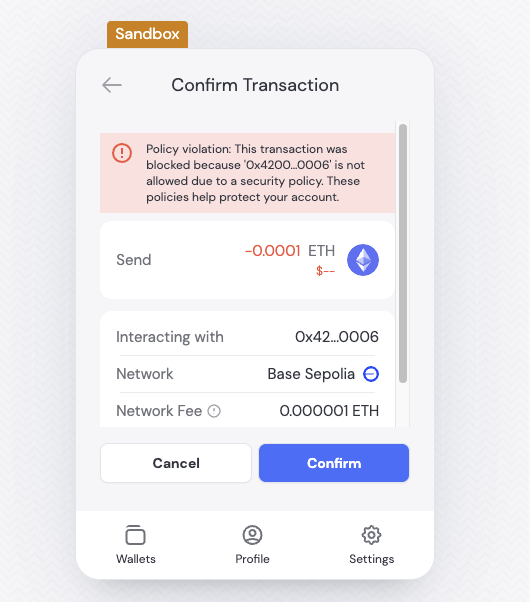
To confirm that your policy rule is enforced, attempt to send a transaction that matches or violates the rule you configured. We recommend performing these tests on a testnet within a sandbox environment. Expected Behavior:- If the transaction complies with the policy, it will be processed as normal.
- If the transaction violates the policy, the SDK or wallet connector will return an error indicating that the operation is not permitted.
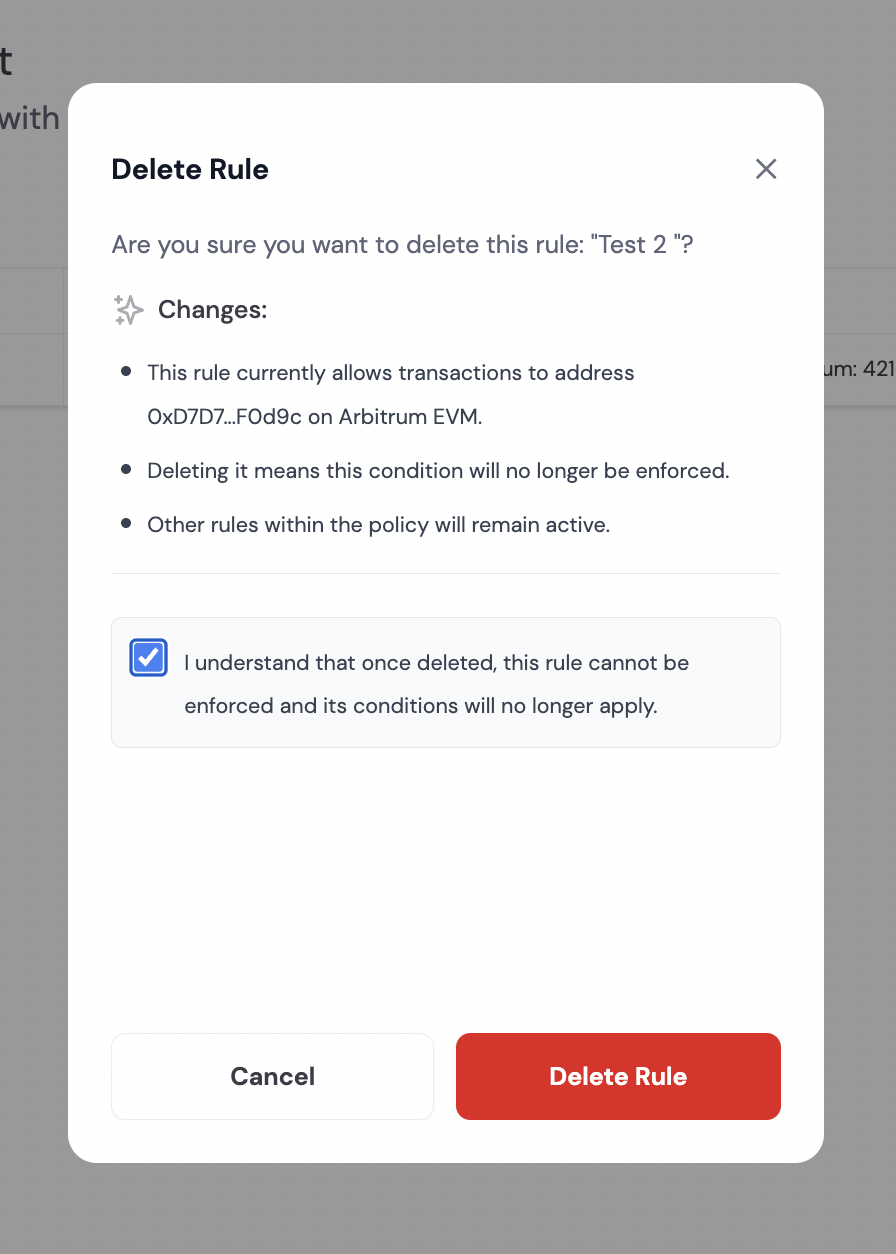
Step 5: Deleting a Rule
If you have active rules, you will see the Policy & Rules Management tab in the Policies tab.- Click
...next to the rule you want to delete, which will expand a dropdown menu with the option to delete the rule - Check the box to confirm you want to delete the rule and click on Delete Rule button
Creating, Updating, and Deleting Rules in Bulk
You can programmatically create or update multiple policy rules at once using the API. To do this, provide an array of rules in therulesToAdd, rulesToUpdate, or ruleIdsToDelete fields of your request payload.
Here is an example of how to create multiple rules using a POST request (SDKs or HTTP clients):
USDC allowlist example (Ethereum mainnet, proxy + implementation) to a single address:
USDC on Ethereum mainnet uses a proxy pattern. To allow interactions, add both the proxy and the current implementation addresses to your allowlist, on this example we are allowing interactions to a single address (0x5f09B2caaafD345EaE7B711A32CcBdf59befB4bB):Value Limit Example (Ethereum mainnet):
On this example we are allowing interactions to a single address (0x5f09B2caaafD345EaE7B711A32CcBdf59befB4bB) with a value limit of 100 USDC:Next steps
Policy Layers
Understand how environment, account, wallet, and signer rules combine.
Violation Webhooks
Receive and handle policy violation events.